Car D.I.Y.

Page may contain affiliate links. Please see terms for details.
cancer patient neighbor asked me to check her tire pressure due to a warning light. they probably just need topping off

turns out that her driver side front tire was low w/20psi & all others were 35psi. Moved the car several times & kept checking the tire but never found any offending object in the tire

filled it a cpl lbs over & let her know. also sounds like she’s gonna need an alternator. hers is making a little racket
 

Hicky

Guru
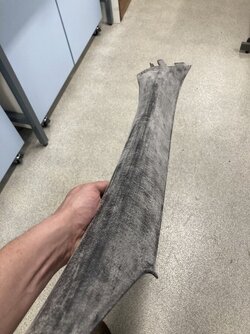
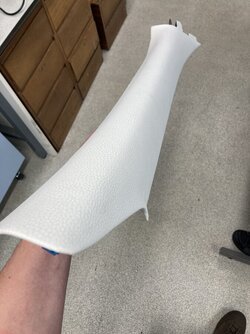
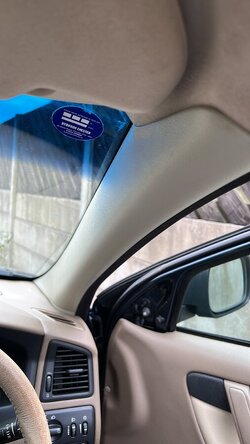
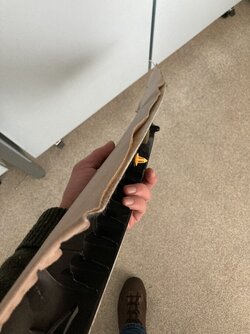
The A pillar, from the usual lining failure through my effort to recover them. This failed as the glue failed with the summer heat…I retried various times with no real success. Having sourced earlier plastic ones from a donor car, my old XC70 looks less tired.
I have a few more jobs on the list, rear wiper motor replacement and investigate why my tailgate sensor thinks it’s continually open🙄
Drivers window regulator and window replacement. A door rubber replacement and glueing a plastic speaker mesh which will require door card removal…kids🫣
Oh and wing mirror replacement(edited: now ordered)….not much then🤣
Now shall I give it the clay bar, wax and owatrol treatment to get the best out of it?
Its a big car to do🫣
 

Attachments

  • IMG_1611.jpeg
    IMG_1611.jpeg
    91.7 KB · Views: 6
  • IMG_1613.jpeg
    IMG_1613.jpeg
    117.1 KB · Views: 6
  • IMG_1615.jpeg
    IMG_1615.jpeg
    94.1 KB · Views: 6
  • 1492359C-4711-45E1-8B0E-05FD43A3A79A.jpeg
    1492359C-4711-45E1-8B0E-05FD43A3A79A.jpeg
    64.8 KB · Views: 5
Last edited:

Fastpedaller

Senior Member
Normal rivets will (imo or experience) have a smallish contact area at the back where the rivet compresses. These with 'spats' I'd have thought would have a greater surface area at the back, better for plastics. Less mechanical strength perhaps, but better suited for more fragile materials.

I've used rivets the same as those to fix to GRP (fibreglass) - as they spread the load as minimise the risk of the GRP cracking ........ When I bought them they were called PEEL RIVETS.
 

Hicky

Guru
Rear wiper motor exchanged for a working variety along with a new wiper arm and blade…now to replace the washer res…bumper off job it looks like unfortunately.
I must get more trim clips…the plastics in the Volvo are now getting brittle.
Whilst the tailgate train was off I managed to hoover up all the glass out of it and sort out a couple of connectors which were giving me the “tailgate open” warning….thanks for not doing the job properly mr auto glass. Two jobs ticked off.
 

CXRAndy

Guru
Location
Lincs
Whilst my Mini awaits spares I decided to do the valve clearance check. They were slacker than you know what. So feeler gauge, spanner and screwdriver set altering all the valves.

I've got a new rocker cover in polished aluminium to give a little bling to the engine bay. Found that the brake reservoir level switch had packed up too, so that's on its order. Next job drive shaft seals/bushings
 

CXRAndy

Guru
Location
Lincs
Drive shaft/differential seal, bush service. Stripped down the hub, brakes pulled the drive shaft part way and removed the differential cover.

1000011926.jpg


Removed seal and pressed bushing out

1000011927.jpg


New bushing installed and aligned with oil feed. The old one was either installed incorrectly or it has spun in it's housing -un likely no sign of damage. I need to ream this new bushing to over size 1 thou of an inch

Cleaned up the gasket surfaces.
1000011928.jpg
 
Last edited:

CXRAndy

Guru
Location
Lincs
Rebuilt the hub with new tapered roller bearings, seals and new top and bottom ball joints, what a faff getting the preload spot on with all those tiny shims.

I cut the old bearing race so I could use it as drift

1000011932.jpg


1000011931.jpg
 

CXRAndy

Guru
Location
Lincs
More tools arrived today. An adjustable reamer and larger micrometer to measure drive shaft accurately.

I got the shaft diameter and adjusted the reamer to a just a bit smaller. This is where my issue began. It was a too big a cut at that size and because the reamer is slightly tapered, getting a precise cut was unreliable. I decided to sneak up on the diameter for the bushing. Here lay the most annoying aspect of this job. Because Alec Issigonis decided for giggles not to make the drive shaft removable in one piece through the subframe. I had a choice of dismantling the inner 'Pot joint' , with all the extra work, tools and materials required to split and reassemble, or I could clamber under the car multiple times to test fit the differential bushing after each reaming cut to make sure I got it super tight clearance with the drive shaft .

Guess which I did?

Anyhow I got there with bushing.

Some photos for your perusal

1000011965.jpg


1000011967.jpg


1000011966.jpg


Im awaiting some non setting gasket sealant, so I rebuilt the other side hub with new ball joints and bearings, faster this time

1000011968.jpg
 
Top Bottom