Complete novice here

Page may contain affiliate links. Please see terms for details.

andythebrave

New Member
Location
Lidlington
Greetings everyone.

I've taken on a project to rescue a 10 year old 26" Triumph Figaro.

Going to strip the frame and repaint and probably change the bars.

I've bought a replacement v brake set as the old ones were beyond gone. I'm pretty sure that I can get these fitted and adjusted correctly.

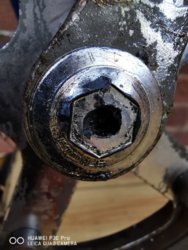
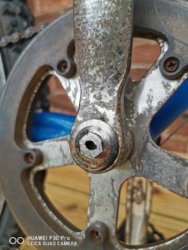
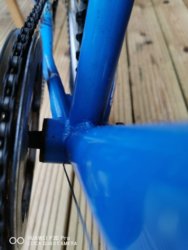
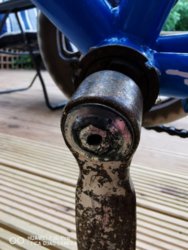
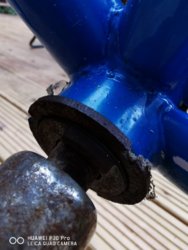
Looking at the crank area though I'm at a loss. I guess the arms can be refinished but how do I disassemble this? What do I need? If it looks like I'll need to replace all this stuff what should I be looking for?
 

Attachments

  • IMG_20200621_133759.jpg
    IMG_20200621_133759.jpg
    109.7 KB · Views: 4
  • IMG_20200621_133806.jpg
    IMG_20200621_133806.jpg
    63.2 KB · Views: 5
  • IMG_20200621_133823.jpg
    IMG_20200621_133823.jpg
    96.2 KB · Views: 5
  • IMG_20200621_133829.jpg
    IMG_20200621_133829.jpg
    78.3 KB · Views: 5

Cycleops

Legendary Member
Location
Accra, Ghana
That appears to be a square taper bottom bracket from what I can see. Never seen that crank arrangemen before but that slotted cap in the middle looks to be a cover, I can just see an arrow on indicating it should unscrew. Find a wide bladed screwdriver and try it but first give it a soak with WD40 or whatever. That entire domed cover should remove. Under there should be a nut, remove this and Use a crank extractor to screw into the crank to remove the crank As in the video.


View: https://youtu.be/c4r8PwKxAOM
If you don’t want to save the cranks you can drift them off with a hammer and iron bar or lump of wood. Before you remove it move it from side to side, if there’s more than a little play you might need to replace the bottom bracket. You could also replace the steel cranks with an alloy one and save weight.
 
Last edited:

Cycleops

Legendary Member
Location
Accra, Ghana
Do you mean that literally? :laugh:
Well Andy you certainly are brave taking that on :smile:.:welcome: to the forum.

Let us know how it goes.
 
Last edited:
OP
OP
andythebrave

andythebrave

New Member
Location
Lidlington
Cheers. I did, copious application of WD40 and a snug fitting flat blade.
The result is not good as that slot appears to be made of silver covered cheese and is now roundish which I suspect is not good.
This is a summer long project so no hurry but my daughter would like to see some progress.
Oh, the pressure.
 

Attachments

  • IMG_20200621_193122.jpg
    IMG_20200621_193122.jpg
    131.5 KB · Views: 2
Top Bottom