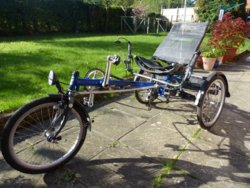
Delta trike rebuilt

Page may contain affiliate links. Please see terms for details.
OP
OP
Bad Machine

Bad Machine

In the garage .....
Location
East Anglia
The original thought that I could steer the front fork tube using a notched light bracket was maybe a little naiive. No matter how far the top nut on fork tube is tightened against the bracket and the lock nut below it (this is a 1" threaded headset), there's play when moving the lever forwards and backwards. And I'm not one for carrying a full set of spanners on every ride.

Brazing a levering plate onto the fork's shoulder - as standard on the factory-built older Hase designs - isn't an option. With a crank drive in situ there would need to be a series of bends in the steerer bar that runs between the fork and the underseat handlebar (I've seen how creative standard Kett owners have had to be to navigate around their TSDZ2 or Bafang motors).

The new idea is to use a short reach quill stem at 90 degrees to normal, wedged at an appropriate height in the steerer tube, connecting to a straight tube that can run diagonally down over the crank drive and on to the handlebar fixing. An M5 rivnut locked into the front of the 16mm Al tube connects to the stem through a rose joint pivot; the rear is clamped (via 2 P-clips, a bridge, and either a rose or thrust joint) to the horizontal section of the handlebar.

I've seen that reducing the distance between fork centre and front rose joint increases leverage, but reducing the handlebar centre to clamp gap at the rear will decrease the angle the front wheel turns, and avoids the steerer tube moving too far in or out from the boom. Several variables to play with - I've made my choice and have ordered the various bits and pieces needed, and will await the post.
 

byegad

Legendary Member
Location
NE England
My 2008 Kett' AL has a strange threadless headset. The bearings are at an angle, because they take a lot more strain than a two wheeler. I had to replace mine at 4500 miles. I found the bearings in Belgium, eventually and only after contacting Hase directly! I then searched the web and turned up a couple more sets, one of which came from Holland, the other from Germany. I did find the Chinese manufacturer, who will sell direct, minimum order 1000 items! I am getting old enough to suspect that I now have enough for my lifetime as the Kett' is my winter ride, and I seem to be covering fewer miles each winter.
 
OP
OP
Bad Machine

Bad Machine

In the garage .....
Location
East Anglia
Very interesting. What were the signs that your bearings had worn ? I'd have thought wear & tear harder to notice on a delta trike with the front being normally very lightly-loaded ? Presumably, you weren't able to dissect these specialist bearings to look for the damage e.g. brinelling ?

I'm not likely to hit that kind of mileage for a while, but maybe I will now check the headset more often........ The Hase Lepus I also have is from about 2003, but has two threaded headsets, the second being part of the seat support / steerer pivot. I've been using its set-up as a guide for the steerer on the Kett rebuild; you can see what it was like when I bought it in 2014.

533729


Lepus 2010 original state.jpg
 
Last edited:
OP
OP
Bad Machine

Bad Machine

In the garage .....
Location
East Anglia
I've been measuring the gap between the fork centre and rose joint position on the Hase Lepus. 47mm approx. Looking through the huge number of photos of quill stems on Ebay was useful to identify any that might have a handlebar clamp bolt that runs parallel to the steerer tube quill (modify existing component easier than fabricating new one, I'd hope).

60 80mm SR Customer stems 705.jpg


Two versions of the SR Custom 1" quill stem were ordered. I found the 60mm version had a 39mm "gap", and the 80mm version, 58mm. Knowing that increased front "gap" would make it easier to turn the forks, the 80mm stem was chosen, fixed in the vice and set to with hacksaw and metal files. Some time later the result was fitted into the front headset, allowing the steerer tube to be attached (16mm Al tube, with M8 rivnut inserted/set in the end, then M8 rose joint).

Modified quill stem in use 705.jpg


Two aluminium plates were cut from 3mm sheet, and fashioned to take rubberised P-clips for the 16mm steerer tube, and the 22.2mm handlebar. I'm not yet happy about the best way to get a bearing between the two - the picture shows current idea, using an oilite bush, a thrust bearing, and an M8 screwset. It works, but it may be bettered !

Steerer components 705.jpg


Using rubber sleeved P-clips has allowed me to experiment with the best position for the pivot on the handlebar (too far lateral, and the steerer tube catches against the inside of the left crank arm; too far towards the centre line, then there's not enough back and forward movement within the arc to rotate the fork). They also make for simple adjustment when changing the length of the boom. Using just one P clip and no aluminium plate resulted in a flexible joint that pulled to one side, hence this version uses two, but on opposite sides.

Steering pivot 705.jpg


The pivot point doesn't sit directly over the 22mm handlebar, but is 47mm to the rear, to compensate for the reach of the handlebar clamp used. It should be 40mm, but I made a mistake when measuring up. :thumbsdown:

Rear steering 1 705.jpg


Rear steering 2 705.jpg


Work on it was interrupted by my neighbour asking me to show him how to mend a puncture - in return he's offered to make me small parts on his newly-purchased CNC router. Once he's learnt how. ^_^
 
Last edited:
OP
OP
Bad Machine

Bad Machine

In the garage .....
Location
East Anglia
Two steps forward ......

I had the trike down from the workbench yesterday, with a plan to check how well the steering works. To do that safely, I set up one of the rear Magura Julie brakes, slipped the 9-speed grip shifter onto the left handlebar upright, popped the brake lever on top, tied the cable & tube out of the way, undid the front wheel immobilising rope, and rolled it onto the driveway.

eKett off ramp 705.jpg


Shortening the boom to the correct length for my legs was first, then adjusting the steerer tube length to compensate next. Sitting in it for a few minutes, and pedalling around proved it would all work, but the following problems were noted:

a) The seat clamp can slide backwards when pushing hard against the pedals
b) The front fork rotates too far, and too easily
c) The 22mm handlebar clamp's P-clips can "wobble"
d) The handlebar uprights are 50-60mm too short

Tightening the seat clamp bolts reduced the slippage, but didn't eliminate it. I think a thin neoprene rubber "collar" between the clamp and the boom will be next to try. I'll also experiment with moving the steerer pivot closer to the centre line, and trying the 60mm quill stem, before drawing up another design for the handlebar/P-clip arrangement. Extending the handlebar uprights is straightforward.
 
Last edited:
OP
OP
Bad Machine

Bad Machine

In the garage .....
Location
East Anglia
Yes, that'd make sense. So I'll persist with the 80mm stem for the moment - Ive just cut 2cm off the height, so that when it expands onto the fork tube, the clamping area is midway between the top and bottom of the head tube.

I've seen that if I rotate the quill's arm slightly clockwise before clamping into the straight-ahead fork position, I can limit how much further the fork turns to the right (because the quill stem limits any further move towards the centre). I might be able to use the same idea to limit the anticlockwise rotation of the fork by seeing how much or little movement occurs with the new rear steerer pivot.
 
OP
OP
Bad Machine

Bad Machine

In the garage .....
Location
East Anglia
Cutting bolts to the correct length is all that remains to do for the new steering pivot assembly, then I can try another test ride; as agreed, moving the rear steering pivot closer to the boom has made a difference.

I took another look at the Lepus steering:
The front fork rotates approximately 45 degrees from centre to max. right, limited by the steerer pole hitting the lower headset cup (max. right)

Right rotate limit 705.jpg


and rotates approximately 45 degrees from centre to max. left, limited by the steerer pole hitting the rear boom clamp. (Picture below is looking from above). Something to learn from.

Left rotate limit 705.jpg


Handlebar upright extensions have been cut from the 22.2mm zimmer frame remnants; the right hand extension (for front brake and 9 speed grip shift) is just a straight piece added in, but the left hand needs more thought - I have been trying out different layouts for the rear brake (Magura), throttle and remote controller, and have kept a non-working gripshift to act as a hand rest.

Left hand idea.jpg


I know many prefer bar-end shifters, but I don't, and I like to use the bar-end for bells, mirrors, and in this case, a "kill switch" (I've still got to make that). The bend in the handlebar tube places the thumb-plate of the throttle in the right spot for my left thumb, but is out of the way when needing to squeeze the brake lever. N.b. the grub screw that secures the TSDZ2 throttle to the handlebar is way too long, so that got cut in half with the dremel. Truncated, its head hides nicely below the surface.
 
Last edited:
OP
OP
Bad Machine

Bad Machine

In the garage .....
Location
East Anglia
01 Left Hand bar end completed.jpg


The finished left handlebar end, with cabling for the throttle and kill switch running through the tube and out through the gear cable barrel adjuster.

The right handlebar end is very similar to the Hase Lepus I have, with a 9-speed gripshift, bell and mirror. I'm trying an annular cycle bell - I thought the design was neat. I started off with a straight bar end, but have preferred matching the look of the curved left, so have duplicated that. I'll have to source better handlebar grips - these have been hard to trim neatly, even with a new blade on the Stanley knife. Maybe because they're really thick heavy rubber. Maybe, possibly, perhaps, because of my technique.

02 Right hand bar end ext.jpg


The original trike remnants I bought included Magura Julie calipers and two rotors (still mounted on the axle); separate left and right brake levers were also with the pile of bits, but no tubing. As I've been happy with a similar set up on the Lepus, the plan has been to repeat the same on the rebuild. The calipers and levers were in an OK condition, but I hadn't been able to test them.

Long before I got the parts for this Kettwiesel, I had picked up a bargain set of HS33 rim brakes for a front wheel, and a pair of "lightly-used" Julies (of a different design), each complete with pads, tubing and levers. Now that the handlebars have been close to completion, I've had them out on the workbench, cleaned and checked them over (one sticking piston loosened on the Julies, missing "D" washer and "hourglass" bolt, olives and shroud nuts sourced from Tartybikes.co.uk finishes off the HS33s). There are some useful videos online (some only in german) for Magura brakes, and it has been good to learn what to do, and what not to do.

03 Magura Julies cleaned.jpg


04 HS33 fitted.jpg


One consequence of using curved handlebar ends - it's impossible to slide a gripshift into the required position from the end, as the bend is too tight. Not a problem - these handlebar ends were add-ons to the existing (straight) unprights, bolted together on a smaller section of Al tube within.

05 Right and Left removed.jpg


It is this break in the handlebar uprights that will allow the hydraulic levers to be removed, and then they can be held in a horizontal position (the system can't be filled and bled properly if they are vertical).

06 FCS722 SA crankset.jpg

Above is the new (temporary) crankset - a square taper 42T Sturmey Archer / Sunrace. 170mm crank length, with double chainguard. An unexpected purchase, needed to keep the project moving along. It's pictured mated to a new Shimano UN-55 127mm bottom bracket, and a recently fettled spacer plate / chain tube stay.

06bMaking  3MM chaintube stay.jpg

The SPD pedals came from the "good to have a spare" parts bin.

Sadly, the TSDZ2 crank motor has a fault, and is currently en-route back to the repair centre in Italy, under warranty. It was new last year, and put to one side but not tested until last week. It performed as expected with the thumb throttle, but the motor wouldn't kick in when pedalling. My guess is the torque-sensor isn't talking to the controller. I chose the TSDZ2 motor over a Bafang based on the very positive experience (1. ease of installation 2. natural "feel" of a torque-sensing controller kicking in the assist when you pedal 3. option of thumb-throttle) of one I fitted to my wife's Raleigh 2-wheeled bike. That's now done its first 1000 miles, without issue.

07 Chain tubes 1.jpg

New chain tubes - from standard 16mm irrigation pipe, cut to size and flared at both ends. Acetone used to remove the "Rainbird" branding printed along the length. They'll be secured at the front end with a vertical aluminium stay.

07 Top Chain tube front.jpg


I'll start with getting the upper tube in the right position before moving on to the lower.

07 Top Chain tube rear.jpg

Just finished that - success ! With fixing only at the front, the rear of the tube is free to follow the position on the chain on the floating idler.
 
OP
OP
Bad Machine

Bad Machine

In the garage .....
Location
East Anglia
It’s looking really good! You must be near road testing now?

Thanks - I think it's looking good too, now that some of the small things are getting finished. I'll be readying all the Magura kit needed to make new hoses, fill and bleed (I have everything apart from a T7 Torx screwdriver for the brake lever reservoir covers, and clean brake pads - both already ordered).

Excuse the pun; Road testing as soon as I've put the brakes on !
 
OP
OP
Bad Machine

Bad Machine

In the garage .....
Location
East Anglia
This morning the rebuild project got its first proper ride. A quick 5 mile circuit to see how well everything works, and what still needs attention.

Before setting off, and whilst still on the workbench, it got a thorough lookover from front to back, checking for anything that hadn't been fully tightened. The most recent work has been on the hydraulic brakes, and an addition to the quill stem steering lever. On Friday I'd finished the day with a freshly-cleaned and bled pair of Magura Julie disc brakes on the rear, and some Magura HS33 rim brakes for the front. They should have this Kett pulling up pretty sharpish - when required.

Julie rear brakes.jpg


This Saturday's job was to make a modification to the steering angles and pivots, so the Kett got back its ability to turn sharply to both left and right, without the handlebars rubbing against the rear wheels.

Quill steerer mod.jpg

(Design for a steering lever add-on for the quill stem, and the finished item, functionally fine, but in need of some cosmetic tidying-up).

Minor things also got done this week. The cheap plastic Sunrace-branded crank bolt covers supplied with the "Sturmey Archer" 42T crankset got a £2.20 replacement of combined allen key / washer bolts in black and silver. A small but definite improvement over the tacky-looking moulded grey plastic. The rubber handlebar grip for the right side got a replacement too - this time I used a craft knife with a new and longer blade, and took my time trimming to size.

Right handgrip redone.jpg


The grips' end caps (which weren't going to get used) now are frame plugs at the top of the seat, the right hand one centre drilled to 7mm for the Hase flag pole.

BBB Handlebar grip ends.jpg


2 pieces of double-sided 25mm velcro tape cut to 30cm lengths - to turn two brake levers into parking brakes.

Annoyingly, the reason for a persistent flat on the right rear inner tube couldn't be found; freshly-unwrapped replacement fitted, pressure holding at 48 hours and counting.

Here's a couple of pictures of the trike as it was today for the road test.

Kett rebuilt 23Aug20 road test.jpg


Kett rebuilt 23Aug20 road test side.jpg


Kett rebuilt 23Aug20 road test rear.jpg

And the key info:

Frame: Hase Kettwiesel c. 2003 Steel (rear frame) and Titanium alloy (front boom)
Seat: ICE "Q" size/ ICE Mesh seat (c. 2006)
Forks: Steel
Headset: Primax/Rudelli 1" threaded
Hub (front): Shimano Deore LX 36H QR
Hub (rear): Hase twin bearing axle and Hase differential
Wheels: Front - LA alloy 406-20C
Wheels: Rear Left - HJC alloy 406-20C Rear Right - Alexrims alloy DM24 406-24
Tyres: 3 x Schwalbe Crazy Bob 20 x 2.10 / 406 54
Crankset: Sturmey Archer FCS 722 42T double chainguard 170mm
Pedals: PowerPlay Force MTB Pedals SPD
Chain: 2 x KMC X9.73
Power idler: Allight 11T
Cassette: Shimano HG 11-34
Rear mech: Shimano Deore LX
Shifter: SRAM Attack Gripshift 9 speed
Front Brakes: Magura hydraulic HS33 / Magura Julie V1 lever
Rear Brakes: Magura hydraulic Julie x2 / Magura Julie V1 lever


So how was the ride ?

The good:

Just a tad worried that something's going to snap/undo/fail. But it didn't.
seat height - easy in, easy out, and no flex with the frame when turning sharply.
gearing - no complaints with current range, 42T & 11-34
gear change - quick response from twist grip up & down, and the floating idler moves from side to side promptly to keep the chainline straight.
Steering - turns on a sixpence.
chain tube - hardly hear it !
curved bar ends - very comfortable - your hands fall into a relaxed position.
rear brakes - you can really feel the trike being yanked back when these get used; the extra time spent cleaning the piston seals on these has been repaid.


The not so good:

steering - there's play within the rose joint that links steerer tube with quill stem lever. I thought that'd rattle, and it sure did ! Replacement needed.
front brakes - working, but compared to the rear, the level feels "spongey" in use. I'll bet I didn't get all the air out of the system.
no physical "stop" for front fork rotation, and the fork "flop" forces handlebar ends into rear wheels on max left/right turns.

What next ? Well, it has moved from a static project onto a rolling one. Today's quick ride picked up some bugs to fix, and there's still some tidying up to do on various custom-made parts, but basically the Kett's back as a rideable trike. I'll need to get out on it regularly and get some more miles on those tyres, just to see how well the various parts hold up. Some paint and mudguards,lights and a rear bag wouldn't go amiss either.........
 
That‘s a nice piece of work! One of the things I like about recumbents is the need for “outside the box” thinking at times to find solutions.

I went through several rose joints on my Kett... for some reason they wear quite quickly. Must be different stresses compared to the track rods on tadpole trikes. The solution was to get a replacement with a grease nipple, just give it a shot of lubricant every so often and it lasts much longer. I bought two for the inevitable next replacement but I’ve not needed to use the second one!
 

Nigelnightmare

Über Member
That‘s a nice piece of work! One of the things I like about recumbents is the need for “outside the box” thinking at times to find solutions.

I went through several rose joints on my Kett... for some reason they wear quite quickly. Must be different stresses compared to the track rods on tadpole trikes. The solution was to get a replacement with a grease nipple, just give it a shot of lubricant every so often and it lasts much longer. I bought two for the inevitable next replacement but I’ve not needed to use the second one!

That's 'Sod's' law.
If you hadn't bought an extra it would have failed and you wouldn't have been able to get an exact replacement.:rolleyes:
 
OP
OP
Bad Machine

Bad Machine

In the garage .....
Location
East Anglia
A slightly longer ride of 15 miles today, with two repair kits - one mechanical, one puncture repair - in zip-up tubes velcro-strapped to the seat frame. Mainly to test the latest steering mod.

IMG_20200905_095922.jpg


Changing over the front rose joint for another didn't solve the rattle, much to my annoyance. Knowing there had to be an explanation, I hoisted the front wheel and fork clear of the workbench and looked closer at how both the front and rear pivots turned.

Not one, but two possible reasons for the rattle.

1. M8 fully threaded bolts have external dim. of approx. 7.8mm, and the front rose joint has internal bore of 8mm. So unless the rose is fastened uber-tight against the quill plate, there'll be movement. Solution - a replacement part-threaded M8 bolt with 8mm un-threaded shank within rose bore.

2. The rear joint was inclined at an angle, approximate to that of the steerer tube when straight ahead. Turning the handlebars changes this angle, and a gap results. No rattle if I cycle straight ahead, but....... Solution - replace thrust washer / oilite pivot with another rose joint than can cope with changing angles.

IMG_20200905_095616.jpg


If funds were unlimited, then it would have been good to have opposite-handed threads on the ends of the steerer tube (rotating the tube would lengthen/shorten it). But how many times have I actually needed to adjust the length of the steerer tube on my Lepus, once it was set up for me ? Maybe once, or twice in six years - and minimal adjustment at that. So rather than go to the extra expense of sourcing left hand threaded rivnut, M8 rod, lock nuts and female rose joint, I've used standard right hand stuff - so I only needed a female rose joint. This set up still allows small adjustments in length, just have to disconnect the front joint first.

Mudguards 2 of 3 a.jpg


There are enough pictures of Hase trikes on the internet to argue this: Hase trikes look naked without mudguards ! They look lanky, vulnerable, and unfinished. With the exception of their most recent design, the Trigo, almost every photo has them fitted. With mudflaps, too. But as I quickly found out, mudguards are only ever available in an even number (which is fine if you happen to be building two trikes, or have a friend with a needy tadpole)..... "Two long mudguards and one short, please, Barman. And my friend here will have two short and one long. ICE ? Yes, how did you know ?". Anyway, I've fitted one front and one rear, with the other rear still to do. Ready for service over the coming months.

(p.s. Does anyone want to buy a single front 20" wheel mudguard, SKS wide, complete with fittings, surplus to requirements......)
 
Top Bottom