OP
OP
Illaveago
Guru
- Location
- Chippenham,Wiltshire.

Allvit was a Huret range derailleur. there is an example shown on https://www.disraeligears.co.uk/site/derailleur_brands_a_to_r.html but not your one.
I have no idea which model btw, I was just referencing VCL vs ICl tubing with that link, its the right era, but spec will no doubt vary between years.
my first proper "racing" bike was a Viking - a kids/teens 26" wheel model in the late 70's, somewhat past their glory years, although I think they were still churning out a 531 framed superlight back then, along with cheaper mass market models.


You've done well. Many would have shrunk from such a task and just ordered a new one.
I found a Swallow down for a fiver but it was just dirty. Came up nicely with some leather balm
View attachment 661139
That looks like a proper job @Illaveago
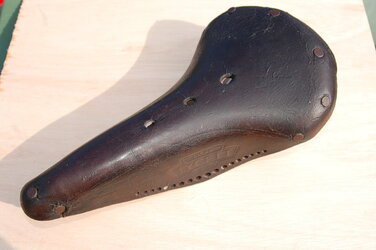
I have been gluing some strips of chamois leather and a small section of thicker leather on the underneath of my saddle . There were some large gaps where the old rivets used to be plus the side piece with the holes for laces had almost broken away. I glued the sections on with contact adhesive.
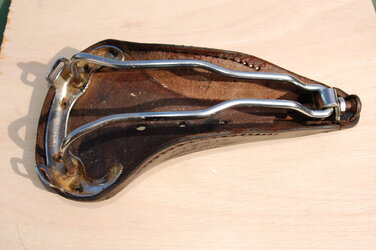
Today I started riveting the metal nose piece on . I started off with one rivet in the top . I needed to drill some holes further back as the original holes had become too large. I glued some small pieces of leather into the old holes. Once the nose piece was in I tried to fit the frame. This was awkward! The leather has shrunk over the years plus I think it might have been under tension originally. I put a round screwdriver into the rear rivet holes to line up the holes and to pull the leather into position. I used a pair of welding grips to hold it in position whilst I fitted a copper rivet. I repeated this action until all the rivets were fitted
View attachment 661124
View attachment 661128
View attachment 661131 .