Looking to replace the cog assembly from new geared back wheel and change out with freewheel cog single i.e. not geared it has two holes just like the TDC raleigh part (shown in photo / link below)
[url="http://i46.photobucket.com/albums/f106/RabidKoala/IMG_8560.jpg"]http://i46.photobuck...la/IMG_8560.jpg[/url]
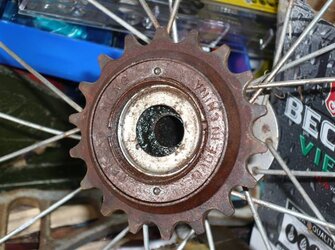
Already removed the axil from both and original geared cog. Just looking to swap old cog over.
How can I remove the single freewheel cog from the wheel? Can I mechanically move this in an anti-clockwise direction using the holes? or What tool do I need?
(See photo)
[url="http://i46.photobucket.com/albums/f106/RabidKoala/IMG_8560.jpg"]http://i46.photobuck...la/IMG_8560.jpg[/url]
Already removed the axil from both and original geared cog. Just looking to swap old cog over.
How can I remove the single freewheel cog from the wheel? Can I mechanically move this in an anti-clockwise direction using the holes? or What tool do I need?
(See photo)