1984 Peugeot (nothing special) Equipe - modernisation project.

Page may contain affiliate links. Please see terms for details.
OP
OP
Colin_P

Colin_P

Guru
I'm reading all this and starting to get daring ideas for restoring my Carlton Kermesse this winter :notworthy:

My advice is if you are thinking about it, get the painting done now. You cannot effectively DIY spray paint in the cold and or damp. Fine if you have a heated garage / workshop though.

Spraying in the cold / damp causes moisture to condense into the paint film as it dries and will likely cause a milky white discolouration, this is called bloom.

Get the frame painted, then fettle with the bolt on bits.
 

Mrs M

Guru
Location
Aberdeenshire
The bike looks fabulous!
Well done :smile:
 

raleighnut

Legendary Member
And what do you know, the doorbell rang whilst I was typing the previous post with more stuff delivered.

Eight speed cassette, it was a 11-34 I ordered, not an 11-32, that is better for me to really granny up those hills, will it fit, will it work, find out soon.
View attachment 375625

And then the thing I have been getting really excited about, the Pletscher "Rat-trap" rear rack. So excited I just had to trial fit it...
View attachment 375626

Look at that, just look at it and drink it in!
View attachment 375627

Shiny shiny happy people
View attachment 375628

Right I must get on and do some work, the work I took the time off of actual work to do and stop messing about with old bikes.
Got one of those on the back of my Raleigh City, ideal cos the brake bridge/plate is drilled to fit it.

DSCN0038.JPG
 
D

Deleted member 1258

Guest
The trouble with having a week off work to dig out and lay an extension to your patio is that invariably you end up dossing about and doing things you shouldn't, like messing about with old bikes.

Some more info, some of which will make some make a Ffffffffff noise.

First of all, pedals, this may trigger some of you! A pair of Wellgo's finest flat resin specials, with reflectors! None of my bikes have those funny clippy pedals that require silly shoes and fast approaching 50, I'm not starting now! I'll be able to get to and from the pub in flip-flops on a bike without them, that is important on those balmy summer evenings.

These are like the Casio watch of pedals, both around in the 80's and both made of resin, I love them.
View attachment 375618


Serious stuff now, duel lever brakes.

Two set below, at the bottom are what has just come off of the bike, a set of pure Weinmann aero (little holes drilled in them) levers, top is a set of Weinmann / Diacompe items which I got off e-bay for a very good price. They are the real deal, these are the ones where you have to get out a massive screwdriver and tighten up the aux levers after every ride wheras the bottom set are rivetted and need no further fettling.
View attachment 375619

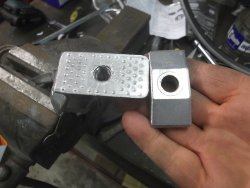
They are as dull as ditchwater, no the patina, not the fact that they are the greatest brake levers ever made.
View attachment 375620

The pure Weinamnn items are now surplus to my requirements so if anyone fancies them, give me a shout.
View attachment 375621

The real deal, Dia-compe's, it really will be like riding in 1985 with these bad boys.
View attachment 375622

I remember the old suicide levers, combined with steel rims, the basic side pull brakes and the blocks of the day you'd have been better off putting your shoe against the tyre to stop. I was glad when they died out. Nice project though, I'm following with interest, it's nice to see an old bike given some TLC.
 

johnnyb47

Guru
Location
Wales
@Colin_P
Thanks for sharing your work on your bike. It looks absolutely amazing. I too am a proud owner of a Peugeot Equipe and as you say they ride along the road so smoothly, My pugs a keeper and would never sell it , as it holds such find memories of years gone by :-)
 
Last edited:
What a truly fantastic read this all has been for me as I go about re-educating my brain to bikes after so many years away out of the saddle, I feel truly privileged to have been allowed to digest such mind stimulating detail and information!

As I have an interest in classic cars and am a regular reader of the Classic & Sportscar magazine, I feel I have to make the following observation as well as to ask:-
In the classic car world there is oft heated debate as to what levels restoration should go to, arguably the vehicle (or in this case bike), be kept in as nigh on perfect mechanical condition yet the body and trim reflect the patina of well loved age?
 
OP
OP
Colin_P

Colin_P

Guru
What a truly fantastic read this all has been for me as I go about re-educating my brain to bikes after so many years away out of the saddle, I feel truly privileged to have been allowed to digest such mind stimulating detail and information!

As I have an interest in classic cars and am a regular reader of the Classic & Sportscar magazine, I feel I have to make the following observation as well as to ask:-
In the classic car world there is oft heated debate as to what levels restoration should go to, arguably the vehicle (or in this case bike), be kept in as nigh on perfect mechanical condition yet the body and trim reflect the patina of well loved age?

As you may have noticed with this bike, convention is out the window. All or any ali parts I can get my mits on will be polished, see below....

.... but I know what your saying and where you are coming from.
 
OP
OP
Colin_P

Colin_P

Guru
Not a good day in terms of parts deliveries, there were none so most importantly the bottom bracket and clearance issues are no nearer being worked out.


WARNING - OCD like content below.

Lashing down with rain outside, radio on inside the garage, and unusually warm for late September, it was time to get polishing. I must say it is really difficult to capture the shine in the photos, i'll take some more in the daylight.

As was, a bit blurry but hopefully you get the idea.
DSCF6516_zpsgdi0vrbc.jpg


One lever polished and in contrast to the other which is untouched.
DSCF6517_zpsbp1xzw72.jpg


And another contrast shot
DSCF6518_zpsli2cbcsd.jpg


Not the best but another
DSCF6519_zpsfqjcrnmx.jpg


DSCF6520_zps4tr72f1t.jpg


The beauty of these levers is that they completely dismantle which means they are easier to do stuff to. With regards to the polish, I bought a kit with two compounds and drill mounted sisal mops / heads years ago. I only use the 'brown' coarse compound to get the finish in the pics. I could go further but as @buzzy-beans has mentioned above want to retain some of the history (war wounds) of the old components. I could get the wet and dry out and through from 1200 up to 2500 prior to polishing and then use both the course and fine compounds to achieve a mirror finish. Except I don't want to it would look wrong and artificial in my mind.
DSCF6521_zps8yipppsk.jpg


One down, one to go. I've come in for a cup of tea and to post this.
DSCF6522_zpsyi4hj2xt.jpg
 
OP
OP
Colin_P

Colin_P

Guru
Some slow progress, mainly around cramming everything in and around the bottom bracket area.

Pics and narrative in no particular order, just the same as my thought processes were jumping all over the place.

So......

The issue is to fit the mudguard whilst accomodating the horizontal front facing rear dropouts which means the rear wheel needs to move forward about 20mm to drop down and to stop the mudguard fouling the front derailleur and to fit the Pletscher stand and to allow room for the gear cable to loop round the bottom bracket shell and up to the derailleur.

Once the bottom bracket area is resovled, it should be plain sailing home. Should... mtb gears on an old steel road frame ... what could possibly go wrong ?

Tight to the derailleur and providing room for the wheel to move forward. I needed a spacer...
DSCF6537_zpsw6feprwb.jpg


I just happened to have this airline quick coupler, I cut it to create a spacer and then as soon as I was finished realised I couldn't use it. It was steel and would rust like billio.
DSCF6538_zpsj0cpekjw.jpg


This thing is a solvent gun. I have have had it about 20 years and never used it and probably never will. Just as well.
DSCF6539_zps2np4qwz4.jpg


It just so happened that its pick up tube is just right for a spacer and made of aluminium. So I cut a bit off and made my spacer. Desparate times call for desparate measures!
DSCF6540_zpsptizpqew.jpg


Feeling very pleased with myself and what I thought was a very elegant solution indeed.
DSCF6541_zps9rgfywb4.jpg


Spacer is spacing, mudguard is fixed at the front lower and there is room for the wheel to move for and aft !
DSCF6542_zpslibhvwd6.jpg


These are the horizontal dropouts for reference. The wheel has to be able to move forward about 20mm before it can drop down and off the frame.
DSCF6543_zpsgnc686yt.jpg


Feeling very pleased with myself it was time for the stand. This is called helecopter tape and apparently they stick it on the rotor blades. If it is good enough for that then it is good enough for frame protection duties.
DSCF6545_zpsgdjbaxqw.jpg


So I stuck some to the faces of the stand so as to prevent scratching (still very pleased with myself at this point)
DSCF6546_zpsdhft8nwu.jpg


And the stand didn't fit. The "elegant solution" mudguard bolt fouls the stand bolt.

I then stared at the shiny bits already fitted for a little while thinking of a solution.
DSCF6547_zps1jplkn7h.jpg


And that was to run a 8mm tap through here and use a pan headed stainless sett.
DSCF6548_zpsc1xtwtki.jpg


It needs cutting down but at this point I'd had enough. My newly painted frame is scratched to buggery as well. A wiser man would do all the fitting up before painting.
DSCF6549_zpsfpbnytdn.jpg
 

Attachments

  • DSCF6546_zpsdhft8nwu.jpg
    DSCF6546_zpsdhft8nwu.jpg
    36.7 KB · Views: 44
Last edited:
OP
OP
Colin_P

Colin_P

Guru
Most of the day was spent digging out for my patio extension and barrowing into the work area a pallet of paving blocks. The existing patio as seen was built by my own fair hand about nine years ago and as soon as I'd finished it I thought, "Should have built it bigger"

However, I have for the last hour or so been fettling the bike...

Nice and tidy, very pleased with that detail. Far more elegant still than the last elegant effort, which I thought was elegant, this is a whole new elegant, almost like Bauhaus desigened.
DSCF6550_zpsrd6fcofv.jpg


DSCF6551_zpsvgfuhfby.jpg


And then the stand!
DSCF6552_zpsdii1axd4.jpg


And the rack fully fitted up complete with the final adjustments to the rear mudguard.
DSCF6556_zpsktdrvx6s.jpg


Bit of oil the splines then new cassette fitted.
DSCF6553_zpsxct7cycw.jpg


The the gears. The new Shimano UN55 bottom bracket fitted. I don't know why but fitting bottom brackets always makes me a bit edgy. Crankset and pedals on also. Then new gear cables. The cable front the front derailleir is naked all the way, no outer at all. The rear has just a short length of outer.
DSCF6555_zpskktd2cpm.jpg


No cable clearance issues at all with either gear cable.
DSCF6557_zps3bz78kmz.jpg


The best thing of all apart from adjusting the limit screws on the derailleurs and taking three links out of the chain, was that it all just works, perfectly. The joys of having the downtube friction shifters means that you can trim any selected gear into silence. I know it is cross chaining but a silent chain can be had in all positions. The only downside and due to frame clearances is that I cannot use the small eleven tooth cog at the back (not that I'd use it anyway LOL).

My attention can now switch the front end and the brakes, which should a lot quicker than all of the messing about so far. But in the interim, I have concrete to mix and lay so things may go on hold over the weekend.
 
Last edited:
OP
OP
Colin_P

Colin_P

Guru
Lots of work done elsewhere today, mainly on the garden so not too much time on the bike.

Anyway, progress so far is.

DONE;
Frame and forks painted.
Forks on.
Bars and stem on including an out front for the garmin, important and a priority that was.
Saddle and stem on.
Water bottle cages on, important and a priority they were.
Bottom bracket, crank, cassette, chain, shifters all on and working perfectly.
Stand fitted and it makes 'that noise' the Pletscher noise of 1979 ! Sherrr-errr-doing-oing.
Err, wheels, tubes and tyres.
Spent ages getting the fit and postion of the brake levers just so.

PART DONE;
Blumel mudgaurds are on and the stays cut to length. They will, as they all require, about another nine hours of adjustment until they are just so.
Ran the brake cables and am a bit meh about the grey outers, think i'll fit a black set
The Dia-Compe A559 deep drop calipers.... they don't really fit this frame. A schoolboy error more than anything on my part really. Despite the bike being thirty plus years old it was built as a 700c machine not a 27" so no need to the deep drops.

TO DO;
Swap the brake outers to black
Polish up and fit the old Weinmann Type 500 brake calipers.... they are not that bad
Touch up any scratches which are a given doing this using DIY paints AND not doing all the trial and error fitting before painting!
Clean it and give all that polished ali a coat of car wax.
Ride it, I cannot wait !
 
Top Bottom