Gravel bike project

Page may contain affiliate links. Please see terms for details.

JhnBssll

Veteran
Location
Suffolk
I've been using my Pilot ti roadbike as a part time gravel bike with some 650b wheels but its getting knocked about more than I'd anticipated. With this in mind I've been scouring the interweb for a suitable frame to build up a purpose built gravel machine and tomorrow I will be picking up the result - a Boardman ADV 8.9 frameset which I picked up for £185 on eBay...

adv_8_9.jpg


It's an aluminium frame and carbon fork. I'm still working on a cunning plan but the basic idea will likely be as follows:

- Check if my Crankbrothers dropper post fits. It should, the frame spec says it takes a 31.6mm seatpost but I'm not 100% sure about the length until I test fit it.

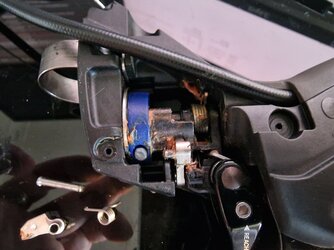
- If seatpost fits I'll need to work out the cable routing - the frame has no internal routing currently so I'll need to get creative (aka make some strategic holes).

- Once I've brutalised the frame I'll need to re-prettify it so a paint job will likely be on the cards. I'm thinking a dark/camo green and purple type scheme but nothing finalised yet.

- I'll get some Hope 15mm QR adaptors so the 650b gravel wheels I've already got will fit on for now. Longer term I'll rebuild the Hope hubs onto 700c rims and sell on the carbon 650b's.

- I'm looking at 1x drivetrains; SRAM Rival1 is my preferred option currently, but I've seen a mod you can make to the left hand mechanism of a Rival22 lever which allows the shift lever to activate the dropper post. If it works this would be pretty nifty and something I'm very keen to try but it does rely on the dropper post actually fitting first :blush:

- Brakes - obvious choice for me, they have to be Hope RX4's :becool:

- Cranks, stem, bars, saddle etc are all still unknowns. I'll get the frame serviceable first and worry about that later :laugh:

As with the frame I'll be buying what I can secondhand to keep costs to a minimum. This should be a fun little project :okay:
 

chriswoody

Legendary Member
Location
Northern Germany
Sounds like a great plan, looking forward to seeing that come together.

I'm just curious about the internal cable routing? I know you'll need to route the dropper post cable internally at the seatpost, but the other cables as well? I've personally not experienced any loss of performance or longevity issues with the external cables on my bike and I much prefer external cables, sadly the bike industry doesn't!

Personally speaking, SRAM Rival 1 is a great groupset, if you go that route are you also planning on fitting an XD driver to the hub? worth it in my view to get the 10 tooth cog, so you can fit the 10 - 42 cassette. Not the widest of ranges, but the best you'll get without going for a mullet drivetrain.

On the tinkering front, Ratio Technology in the Lake District offer some great upgrade kits for these drivetrains, so you could upgrade Rival 1 to 12 speed if you so wished, I'm very tempted myself.

Last one and a minor one, but just a recommendation on some gravel bike handlebars, I fitted some Salsa Cowchipper bars to mine, 500mm wide with 24 degrees of flare, brilliant bars, super comfy and really improve the slow speed handling of the bike. They come in a range of widths and are quite reasonably priced as well.

Good luck with the build though and I'll look forward to seeing the end result.
 
OP
OP
JhnBssll

JhnBssll

Veteran
Location
Suffolk
Some great info for me to look in to there Chris, much appreciated!

Regarding the internal routing I'm hoping to only need one hole to route the dropper cable in to the seat tube - I'm more than happy to leave everything else external, especially on a bike thats likely to live a muddy existence and require regular cable changes :laugh:

I'll definitely look in to the 12 speed option, I actually have an XD driver body sitting in the garage so I'm halfway there!
 
OP
OP
JhnBssll

JhnBssll

Veteran
Location
Suffolk
Decided to buy some bits to experiment with so I've got a used GX Eagle mech and a pair of used Rival 22 brifters on the way from eBay. I've also ordered the Ratio Technology 1x12 Wide Upgrade Kit so will strip both levers when they arrive and rebuild the right hand one with the new 12speed parts and the left hand one with no ratchet for the dropper post :okay: This is already sounding like fun :laugh:
 
OP
OP
JhnBssll

JhnBssll

Veteran
Location
Suffolk
Just done some quick calcs using the geometry geeks website and measuring a couple of my current bikes to see if the dropper post will fit. Seems I'm currently running 755mm between the centre of the bottom bracket to the saddle rails; given that the ADV 8.9 has an actual seat tube length of 555mm this leaves exactly 200mm of seatpost. Reading through the Crankbrothers sizing guide, the minimum insertion depth for the 150mm travel post I have in the garage is 197mm, so on paper it'll fit but only just :laugh:

I've now ordered some paint too - I'll be repurposing some purple Hope parts for this build so want to blend them in with the frame colour. I've gone with a candy midnight emerald for the main colour and I'll do some bits in candy rich aubergine. I'll work out the actual scheme once the frame is here and cleaned up :okay:

midnight-emerald-3-1.jpg


rich-aubergine-1-1.jpg


I think they should look rather nice next to each other but we shall see 😄
 
OP
OP
JhnBssll

JhnBssll

Veteran
Location
Suffolk
The Rival 22 levers arrived this morning :okay: I didn't waste any time opening the left hand lever up to see how easy the ratchet pawl was going to be to remove in order to convert it to a dropper lever. Heres the lever with the cover removed and the pawl circled:

20221118_111421.jpg


It sits on a shaft which is lightly pressed in to the lever body and held in place with a small C clip - with the C clip removed you can simply push the shaft out of the housing and the pawl drops out...

20221118_111823.jpg


I've popped the cover back on and it's now basically ready to go as a dropper post lever, simple as that 😊 The bits from Ratio Technology are due to arrive tomorrow so I'll try and get the right hand shifter upgraded over the weekend. This afternoon I'm off to collect the frameset :okay:
 

Attachments

  • 20221118_111834.jpg
    20221118_111834.jpg
    134 KB · Views: 4

chriswoody

Legendary Member
Location
Northern Germany
Just a thought, SRAM Rival levers can have a problem with the master cylinder gumming up, I've had it a couple of times on my bike. It might be worth a quick check now whilst the levers are dry and off the bike. Whilst a little fiddly, It's quite a straight forward job to do, even more so if the levers are empty of fluid. The SRAM Hydro R service manual, details the process quite nicely along with some clear pictures.
 
OP
OP
JhnBssll

JhnBssll

Veteran
Location
Suffolk
I've got the frameset home now, it looks very nicely put together so once I've addressed a few cosmetic issues it should be good as new :okay:

I have popped the dropper post in and am pleased to report it fits perfectly 😄 I have also noticed that the frame already has bosses and an opening in the seat tube for the dropper post cable so minimal work required there! I might open the hole up slightly and epoxy a nice grommet in before I paint it just for maximum neatness and to minimise water ingress but the fact there's already a factory hole in the tube is a great start :becool:

20221118_183841.jpg


20221118_195846.jpg
 
OP
OP
JhnBssll

JhnBssll

Veteran
Location
Suffolk
Some further work this evening on figuring out the dropper workings. The problem I have to overcome is that both the dropper and the lever want to have the 'pip' end of the cable and neither are designed to clamp the cut end. I knew this was the case and ordered a stainless cable clamp to play with but until I had the bits in my hands I couldn't do much more... So, here's the clamp I bought...

20221118_211839.jpg


It's pretty small, 8mm diameter with a 3mm bore and 15mm long. The idea is to use two cables - one pip in the dropper, one pip in the lever, and join them with this clamp somewhere in between. Now I've test fitted the dropper and seen how much space there is below it I am comfortable that I can fit the join inside the seat tube, so I've done a quick bit of CAD to design a little housing.

2022-11-18_21h20_21.jpg


So the idea is the cable outer will go in either end, and the clamp will slide up and down the middle. I measured the cable pull from the lever at 12mm so I've left enough for that plus some extra in case of cable stretch, and will add an inline barrel adjuster up near the bars. The part will be in compression but the loads are small so I'm hoping a 3d printed resin part will be more than up to the task - only one way to find out! To the printer... :laugh:
 
OP
OP
JhnBssll

JhnBssll

Veteran
Location
Suffolk
I had some goodies arrive today 😄

20221119_094504.jpg


£75 for the kit seems expensive when you look at what you get, but knowing that the replacement ratchet is 3D printed in stainless steel goes a long way to explain that cost. The parts are all very good quality too, they've not cheaped out on any of the parts which is reassuring from a reliability stand point. As usual I didn't waste any time...

20221119_094521.jpg


20221119_094708.jpg


The internals come apart really easily and they provide an instructional video on their website detailing exactly how to do it. Once its apart like this though you just have to pull the old ratchet off the cable reel then push the new one on and reassemble... I cleaned everything up first of course, the original grease was pretty crusty :laugh: Here's the new ratchet assembled with the shaft pushed halfway in...

20221119_101411.jpg


And here it is fully reassembled and working. The only things I did after this were apply a thin coat of grease to the ratchet assembly and reassmbled the cover :okay:

20221119_101903.jpg


All working, and 12 indexed gears available. Job's a goodun :okay: Now waiting on the mech to arrive so I can assemble the other bits of the kit - the cable fin needs replacing to achieve the correct cable pull ratio and a barrel adjuster needs adding to the mech - the mtb groups have the barrel adjuster at the shifter whereas the road groups have it at the mech, so using a road shifter with a mtb mech eliminates the barrel adjuster at both ends otherwise :laugh:

My paint should be arriving today and the 3d printed dropper adapter is awaiting post processing so with the tidying that also needs doing I've got a busy day ahead in the garage :laugh:
 
OP
OP
JhnBssll

JhnBssll

Veteran
Location
Suffolk
I spent a few hours cleaning the frame this afternoon, it came up pretty well...

20221119_165400.jpg


If it weren't for the numerous deep chips and the fact I've got some purple parts to use I'd have been tempted to use it like this to be honest, but there you go... Once I'd got it looking nice I got the sandpaper out and made it look rubbish again :laugh:

Once it was keyed I put down a base coat of grey primer and I'm now building up the damaged areas with orange filler primer. I've been putting it on pretty thick with lots of run in the knowledge that I'll be sanding it all back again anyway so its not a pretty sight at the moment :laugh:

20221119_203230.jpg


Once that's had a chance to cure (hopefully tomorrow evening) I'll sand it back and see how much of the damage has been covered. I suspect it'll take a few goes to get it right but once I'm happy with it I'll do another full coat of grey primer before I put the base coat of coarse metallic silver down.

20221119_152229.jpg


I'm not sure how to mask off for the candy coats yet but I'll work it out as I go along I'm sure :laugh: Or I won't and I'll end up having to strip it all off again :tongue:
 
Top Bottom