roley poley
Veteran
- Location
- leeds
tried my old but good pedals out on the genisis with toe clips and straps now I know why I gave them up over 10 years ago 'orrible foot clamps will ride them as platforms and have a better safer time


I's not my idea, I think I read it first on Sheldon Brown but it certainly works.Inspired by an idea from @raleighnut Ive made a fixed cup removal tool, this grips the cup and when you tighten it, as the cup has a left hand thread, it removes it. View attachment 532874
View attachment 532875
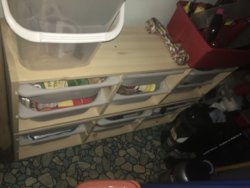
Our pantry has always been a bit of mess and it’s not played well with my ocd.
It mostly has always doubled are tool store and other useful rammel. Most of the storage in the past has not really worked and not really fitted well. Now with added bike tools time was right for right solution. So had a look on ikea site found something and they arrived yesterday. So built them up and today refined what went in what place. 2 wall mounted storage units later and now one tidy pantry and one happy me. Also built up the replacement chair for the living room desk.
Then spent the afternoon giving the hound a fur cut. Been a while since I’ve done one and our last
dog was not the happiest at having it done either and had less fur due to his health conditions.
This one however just let’s you do want you want though he is a bit fidget. All in all I’ve not done bad.

 So I drilled a hole in it and screwed it to the back of the computer...
 I retained the original locating hole to attach the lanyard to. Four holes in total were needed - the original through the middle at a slight angle to bolt it to the computer, one above and one below drilled and tapped for the dog ears to screw to, and one to the right to locate an anti-rotation pin through that locks in to the computer case to stop it spinning round when you try and attach or remove it
I get that 'rubbing on a couple of my bikes if I use too small a rear gear when on the inner ring of a triple.At least I know when I'm 'cross chaining' badly and change to the middle ring.I put a Campagnolo Veloce triple crankset onto the Claud now that the ISO bottom bracket has come. The bracket is a Centaur at 111mm. The crankset looks lovely.
The problem is getting the front mech to match up - its the Exage 300 that was on the bike originally, and there are two things I am struggling with.
The small ring on the crankset is 30 teeth and the mech is rubbing at the lower rear on the horizontal section, not the sides, so it seems to be too high for the vertical chain position. If I push it out manually it is at the right height to just clear the big ring, so I can't lower it. I guess the cage is too short for the 30 tooth crank and a longer version is required. Also, the mech doesn't seem to have the range on the high limit screw to make the full traverse needed for the triple. Lower limit screw is set ok, but the crank still has quite a bit of clearance to the frame. I wondered about a narrower bottom bracket but have only found ISO versions down to 107mm so far and the 2mm move inboard isn't going to change much as the outer face of the cage barely passes the big chainring at the moment.
So, are there specific front mechs with longer cages and wider limit screw range that will do a triple crank? I'm familiar with different cage lengths on rear mechs but this is a bit new for me at the front. The shifter is a downtube friction model so there are no issues with range or compatibility there. Rear mech is a Dura-Ace 7700 and the cassette is a 7 speed (at the moment but plan to go to 9 speed later on.)